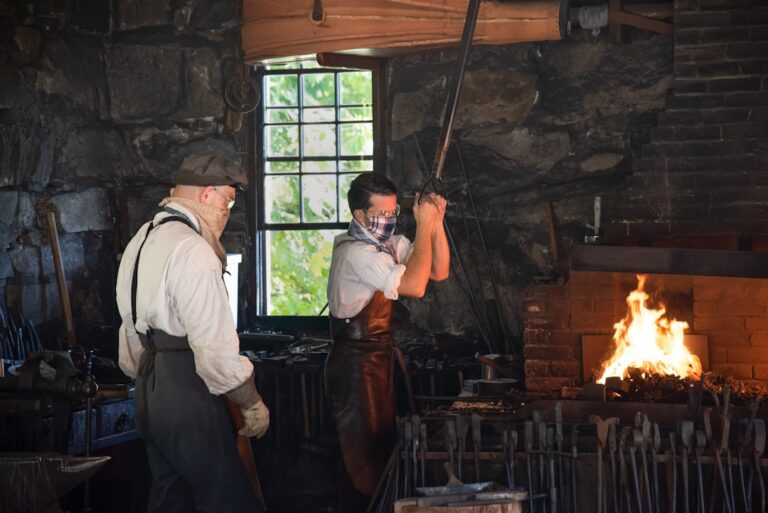
Blacksmithing is an ancient craft that has captivated artisans and hobbyists alike for centuries. As I delve into this fascinating world, I find myself drawn to the rhythmic sounds of hammer striking metal, the mesmerizing glow of heated iron, and the satisfaction of creating something tangible with my own hands. The art of blacksmithing is not merely about forging metal; it is a blend of creativity, skill, and tradition that has been passed down through generations. Each piece I create tells a story, reflecting both my personal journey and the rich history of this craft.
The allure of blacksmithing lies in its ability to transform raw materials into functional and artistic objects. From tools and hardware to intricate sculptures, the possibilities are endless. As I embark on my blacksmithing journey, I am reminded that this craft requires patience, practice, and a willingness to learn from mistakes. The process of heating, shaping, and cooling metal is not just a technical skill; it is an art form that allows me to express my individuality while connecting with a time-honored tradition. In this article, I will explore the essential tools, techniques, and resources that have helped me navigate the exciting world of blacksmithing as a beginner.
If you’re interested in setting up a beginner blacksmithing workshop, you might also want to check out the article on modern blacksmith shops, which discusses the tools and techniques that can enhance your crafting experience.
This article provides valuable insights into how contemporary advancements can be integrated into traditional blacksmithing practices.
You can read more about it here: Crafting in the 21st Century: Modern Blacksmith Shop.
Key Takeaways
- Blacksmithing requires specific tools, a safe workspace, and knowledge of basic techniques.
- Essential beginner tools include a forge, anvil, hammer, and tongs.
- Safety is crucial: always wear protective gear and maintain a well-ventilated workspace.
- Starting with simple projects helps build skills and confidence.
- Utilize available resources like books, online tutorials, and local classes to improve.
Essential Tools and Equipment for a Beginner Blacksmith Setup
As I began my blacksmithing journey, I quickly realized that having the right tools is crucial for success. A basic blacksmith setup typically includes a forge, an anvil, hammers, tongs, and safety gear. The forge is where the magic begins; it is the heart of my workspace where I heat the metal until it becomes malleable. There are various types of forges available, from coal forges to propane forges, each with its own advantages. I opted for a propane forge due to its ease of use and efficiency, allowing me to focus on honing my skills rather than managing a coal fire.
The anvil is another essential piece of equipment that serves as my work surface for shaping hot metal. When selecting an anvil, I learned that weight and material matter; a heavier anvil provides better stability and durability. Alongside these primary tools, hammers and tongs are indispensable for manipulating the heated metal. I started with a basic cross-peen hammer and a pair of tongs designed for gripping flat stock. As I progressed, I discovered the importance of having a variety of hammers for different tasks, such as drawing out or upsetting metal.
Setting Up Your Blacksmithing Workspace

Creating an efficient workspace is vital for any aspiring blacksmith. When I set up my blacksmithing area, I considered factors such as safety, accessibility, and organization. I chose a well-ventilated outdoor space to minimize the risk of inhaling harmful fumes while working with hot metal. Additionally, I made sure to have a sturdy workbench nearby for assembling tools and materials. Having everything within arm’s reach allows me to maintain focus on my projects without unnecessary interruptions.
Safety is paramount in blacksmithing, so I took care to equip my workspace with essential safety gear. This includes heat-resistant gloves, safety glasses, and an apron to protect myself from sparks and hot metal splatter. I also made sure to have a fire extinguisher nearby, just in case. Organizing my tools in a way that makes them easy to access while keeping them out of harm’s way has proven invaluable as I work on various projects. A clean and organized workspace not only enhances productivity but also fosters creativity as I immerse myself in the art of blacksmithing.
Basic Techniques and Safety Tips for Beginner Blacksmiths

As I began practicing blacksmithing techniques, I quickly learned that mastering the basics is essential before tackling more complex projects. One fundamental technique is drawing out, which involves elongating a piece of metal by hammering it while it is hot. This technique requires practice to achieve even results and avoid overworking the metal. Another important skill is upsetting, where I can increase the thickness of a section by hammering it down on the anvil’s face. These foundational techniques serve as building blocks for more advanced methods.
Safety should always be at the forefront of my mind while working with hot metal and heavy tools. One crucial tip I’ve adopted is to always keep my work area free from clutter to prevent accidents. Additionally, I make it a habit to wear appropriate safety gear at all times—gloves, goggles, and protective clothing are non-negotiable in my workspace. It’s also important to be aware of my surroundings; ensuring that flammable materials are kept at a safe distance from the forge helps mitigate fire hazards. By prioritizing safety and practicing basic techniques diligently, I can enjoy the rewarding experience of blacksmithing while minimizing risks.
If you’re interested in expanding your blacksmithing skills beyond the basics, you might find the article on blade smithing particularly insightful. It delves into the intricate techniques involved in crafting masterful blades, which can complement the foundational setup discussed in “This Beginner Blacksmith Setup Actually Works.” Exploring this resource can enhance your understanding of the art and provide you with valuable tips for your blacksmithing journey. For more information, check out the article on blade smithing.
Choosing the Right Materials for Your Projects
Selecting the right materials is another critical aspect of successful blacksmithing. As a beginner, I found it helpful to start with mild steel due to its forgiving nature and ease of manipulation. Mild steel is versatile and can be used for various projects ranging from simple hooks to more intricate designs. As I gained confidence in my skills, I began experimenting with other materials such as tool steel and wrought iron, each offering unique properties that can enhance my creations.
Understanding the characteristics of different metals has also been an enlightening part of my journey. For instance, tool steel is known for its hardness and ability to hold an edge, making it ideal for crafting knives or chisels. On the other hand, wrought iron has a distinct aesthetic appeal due to its fibrous texture and historical significance in traditional blacksmithing. By exploring various materials and their applications, I can expand my repertoire and create pieces that reflect both functionality and artistry.
Recommended Projects for Beginners
As I embarked on my blacksmithing journey, choosing beginner-friendly projects was essential for building confidence and skill.
One of my first projects was crafting simple hooks—an excellent way to practice basic techniques like bending and twisting metal without overwhelming complexity.
These hooks not only serve practical purposes but also allow me to experiment with different shapes and finishes.
Another rewarding project was creating a small decorative item such as a candle holder or a simple knife. These projects challenged me to refine my techniques while providing opportunities for creativity in design. As I progressed, I found that making functional items like bottle openers or garden tools helped reinforce my understanding of how form follows function in blacksmithing. Each completed project not only boosted my confidence but also ignited my passion for exploring more intricate designs as I continued to develop my skills.
Troubleshooting Common Issues in Blacksmithing
As with any craft, encountering challenges along the way is inevitable in blacksmithing. One common issue I’ve faced is overheating the metal during forging, which can lead to unwanted changes in its properties or even cause it to become brittle. To address this problem, I’ve learned to monitor the color of the metal closely; a bright orange glow indicates optimal forging temperature while avoiding excessive heat helps maintain its integrity.
Another challenge I’ve encountered is achieving clean welds when attempting more advanced projects. Poor welds can result from insufficient heat or improper alignment of the pieces being joined together. To improve my welding skills, I’ve focused on ensuring that both pieces are at the correct temperature before attempting to join them and have practiced proper alignment techniques consistently. By troubleshooting these common issues and learning from each experience, I’ve been able to refine my skills and grow as a blacksmith.
Resources for Further Learning and Improvement
As I continue on my blacksmithing journey, I’ve discovered numerous resources that have significantly contributed to my growth as an artisan. Online platforms such as YouTube offer a wealth of instructional videos covering everything from basic techniques to advanced projects. Watching experienced blacksmiths share their knowledge has provided me with valuable insights into different approaches and styles.
Additionally, books on blacksmithing have become indispensable companions in my learning process. Titles like “The Complete Modern Blacksmith” by Alexander G. Weygers have offered comprehensive guidance on techniques, tools, and project ideas that have inspired me along the way. Joining local blacksmithing clubs or workshops has also proven beneficial; connecting with fellow enthusiasts allows me to share experiences, seek advice, and learn from one another’s successes and challenges.
In conclusion, embarking on a journey into blacksmithing has been both rewarding and transformative for me. From understanding essential tools and setting up an efficient workspace to mastering basic techniques and troubleshooting common issues, each step has deepened my appreciation for this ancient craft. As I continue to explore new materials and tackle increasingly complex projects, I remain committed to learning and improving through various resources available in this vibrant community of artisans. Blacksmithing is not just about forging metal; it’s about forging connections—with history, creativity, and fellow craftsmen—making it an enriching experience that I cherish deeply.
FAQs
What basic tools are needed for a beginner blacksmith setup?
A beginner blacksmith setup typically includes an anvil, a forge (coal, gas, or electric), a hammer, tongs, and safety equipment such as gloves and eye protection.
What type of forge is recommended for beginners?
Many beginners start with a simple coal or propane gas forge because they are relatively affordable, easy to use, and effective for heating metal to workable temperatures.
Is it necessary to have a professional workshop to start blacksmithing?
No, a beginner blacksmith setup can be established in a small, well-ventilated space such as a garage or backyard, as long as safety precautions are followed.
How much space is required for a beginner blacksmith setup?
A compact area of about 50 to 100 square feet is usually sufficient for a beginner setup, allowing room for the forge, anvil, workbench, and safe movement.
What safety measures should beginners take when blacksmithing?
Beginners should always wear protective gear including gloves, safety glasses, and a leather apron, ensure proper ventilation, keep a fire extinguisher nearby, and maintain a clean workspace free of flammable materials.